GL Control GmbH is a subsidiary of GL Messtechnik GmbH, which specialises in the development, production and distribution of laser-based profile measuring systems in its origins for almost 30 years. With the takeover of the employees as well as the existing measuring solutions which focus, GL Control GmbH is the true partner for precise and non-contact measuring solutions for laser-based capture of internal geometries of tubes and other hollow bodies. Their worldwide customer portfolio mainly includes the manufacturers of piping. Due to their adaptability, their measuring solutions can be easily and flexibly integrated into existing work processes or support the digitalization of work processes.
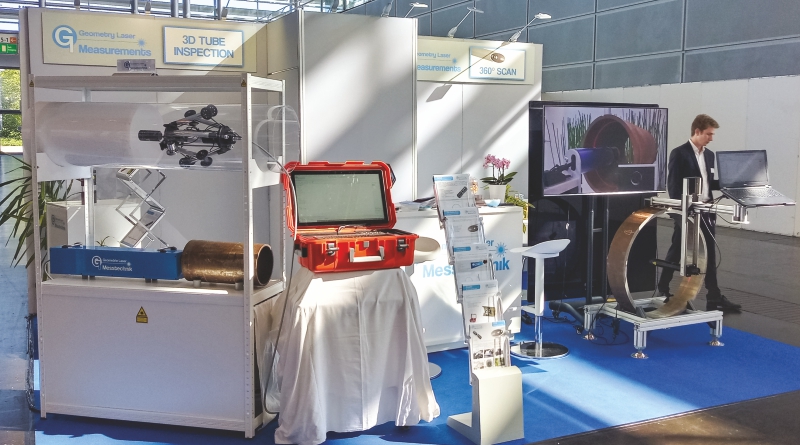
Journey and Milestones of GL Control GmbH
Dr. Noll founded the company, Dr. Noll GmbH in 1993, for customers in the tire industry to measure tire profiles by laser. His measurement systems were soon used by tire manufacturers, test institutes, and car producers worldwide. He reached to be no. 1 in the tire industry. In 2015, after being successful in the tire industry, he founded the GL Messtechnik GmbH and expanded into the automotive industry and in the tube industry with new developments. In 2023, the subsidiary GL Control GmbH was founded which concentrates on the development of laser technology for pipeline inspection. Tube manufacturers and testing labs are very successful using the technology of GL Control GmbH.
Traditional inspection was manual, visual, and user-dependent, now our CiTriS Sensor has more speed, more repeatability and accuracy and the ability to measure deeper into the pipe. Major testing labs for pipelines use this technology for worldwide inspection. Tube producers use this technology for 100% inspection. Nuclear reactors use this technology to inspect non-accessible tubes. GL Control GmbH supports the permanent R&D of new products. The quality is strictly high to solve the requirements of modern tube surfaces.
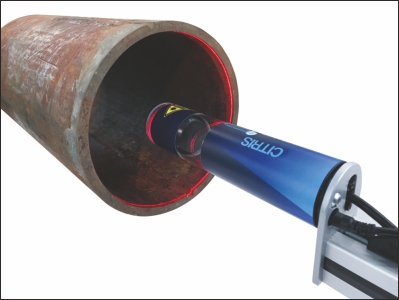
Circular Triangulation Sensor “CiTriS”
In the realm of industrial measurement and inspection, accuracy and efficiency are paramount. Circular triangulation sensor also known as CiTriS, transforms the way the inner geometry of bores, tubes, tanks and other cavities is measured and assessed. The radial laser beam measures the inner geometry around 360° in 3600 angle steps which results in a precise inner cross section, and a 3D-model of the inner surface profile. Using this technology, the verification of tolerances is possible.
The sensor has no rotating parts and projects a 360° radial laser beam on the target inner surface and measures the contour. The projected laser line is imaged by a high-resolution image sensor. Using image analysis, the 2D contour of the cross section is created. In a single scan 3600 radii along the circumference are measured with a speed of up to 60 scans per second resulting in a radial resolution of 10µm.
Operation in Extruders
The potential applications of CiTriS are diverse and far-reaching. In the domain of extruder, bore holes are subject to wear and need regular inspection and CiTriS emerges as a game changer. The scanner can be seamlessly inserted at varying depths, employing guiding sleeves or round guiding brushes to maintain the aspect and centralise the sensor. Operating at 60 scans per second, a 10 m tube can be inspected in 180 seconds with over 10000 cross sections. More than 38 million measurement points provide a detailed surface inspection. The sensor should be easily moveable along the length of the tube. Exact centring is not required because of the wide radial measurement range of the sensor. The smallest sensor has a length of 169mm and measures a range of diameters from 60mm to 160mm. Larger sensors measure ranges up to 1000 mm. Smaller measurement ranges are in development.
Depth Determination
Depth determination is a critical aspect of CiTriS’s functionality. The distance signal, produced by an encoder, is integrated to trigger sensor measurements and correlate them with the scanner’s position. When mounting the CiTriS on a roller skid, the encoder can be mounted on a measuring wheel. In the case of small-bore holes and operation with sliding sleeves, the cable length inserted into the bore hole will be measured for information on distance. A special cable guide with integrated encoder is available. In the case of mounting the CiTriS on a lance, which is inserted into the bore, the encoder will be mounted directly on the lance guide.
3D-Measurement
By using information gathered during depth determination through the encoder, a software can assemble all cross sections with precise depth information to create a point cloud of the inner surface of the bore resulting in a complete 3D-model of the bore. The complete model can be dimensioned and analysed, with the ability to highlight and dimension defects. For the application of third party external 3D analysis software, STL-export is available.
Collinearity and Straightness Determination
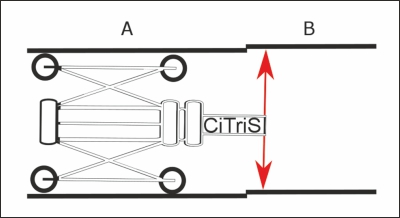
The collinearity of the extruder elements describes a misalignment between the individual elements. In order to measure such an offset, CiTriS is mounted on a roller slide peeping out. At the transition between two elements A and B, the centering should take place in element A and the measurement in element B.
By fitting a circle to the measured data of CiTriS, an offset can be calculated. This value changes suddenly as soon as the measuring plane of CiTriS has been moved from element A to element B.
To determine the straightness of an extruder bore, an additional point laser is radiated through the extruder elements from the opposite bore opening as a benchmark. CiTriS will be guided slidable and approximately centrical, e.g. mounted on a roller carriage, into the bore opening. A module consisting of a camera and a focusing screen is attached to the front of the CiTriS to detect the directional laser. The laser beam serves as an absolutely straight reference line. The detection unit is moved along this reference line in the pipe. Here, the offset to the reference line is continuously measured by the local detection of the laser point on the screen. A possible displacement of the detection unit from the center of the bore hole can be corrected using the measurement values from CiTriS.
The result provides the offset of the center point of the respective bore cross-section to the reference line at each measurement position. This corresponds to the straightness of the extruder bore. With this structure, a possible misalignment of individual extruder elements in relation to one another becomes visible due to a jump in the coordinates when the roller carriage transits from one extruder element to the next. This corresponds to the collinearity of the extruder elements to each other.
Also Read: InspecTech Analygas: Customized Non-Destructive Testing Solutions
Measurement in Tubes
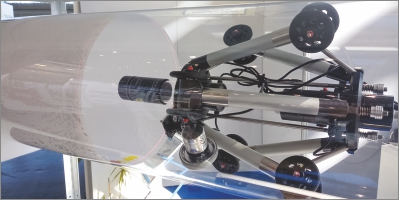
For tube inspection, 2D analysis software is already available. The Inspection outputs are radii, ovality, minimum internal diameter, maximum internal diameter and tolerances. Using an external measurement stand, or a centraliser inserted into the tube, the analysis is possible over the total length of the tube. For 3D inspection of the tube end a special scanner is available which moves the sensor up to 300 mm into the tube and inspects the tube end completely from the inside . Tube diameter, ovality and dents will be measured. A special feature is the measurement of the pipe end cut geometry and the weld seam profile (cut geometry is important for tubes that will be welded together).
For the complete scan of tubes, a crawler with integrated CiTriS is available . The crawler propelled scanner moves through the complete tube and checks the inner surface for defects. Additional features for tube straightness are available. The standard CiTriS sensors have a diameter of 55.9 mm and radial measurement ranges of 50 mm – 500 mm. The sensor has a USB-3-interface for 5V-power supply and data interface to a computer. The laser class 2M allows applications without any special safety measures. For developers, who would like to integrate the sensor into their own applications, an Application Programming Interface (API) is available.


